
Hey y'all! First off I want to apologize for not posting in what seems like forever. Ever since school has started back I seem to have no free time! Today however, I had a lot of free time to relax and do what I love, decorating and baking! My roommate and I decorated our place for Halloween today which got me in the spirit to whip up some wicked treats! I figured yall may want the recipe seeing as there is still so much time left in October for Halloween parties and fun goodie-bags!
Candy Corn Rice Krispies
Yellow Layer
2 1/4 cup rice krispies
1 3/4 cup mini marshmallows
1 1/2 tsps butter
Yellow food coloring
8 inch circle container
First, in a microwavable bowl, put the marshmallows, butter, and food coloring together and microwave for 30 seconds at a time, stirring in between each microwave. Once everything completely mixes and is liquified, you can stop microwaving (usually only takes one 30 second microwave for me).
Second, you add the Rice Krispies and mix everything together.

Moving quickly, you must take the mixture, and put it in the container making the outer ring. It is best to just use your hands, but be sure to rub butter on your hands first, or you are in for a sticky mess. (THE BUTTERED HANDS ARE KEY TO THIS WORKING!!!)

You must repeat the same steps for the next two colors, but use the correct measurements, as the rings do get smaller!
Orange Layer
1 1/4 cups rice krispies
2 1/4 cups mini marshmallows
1 tbsp butter
Orange food coloring (red and yellow mixed make orange)
White Layer
1 cup rice krispies
1 1/2 cup mini marshmallows

Once you have completed all the layers, let it sit for an hour or two, or even over night, before cutting. I have also put mine in the fridge before for about 15 minutes and then cut it! This 8 inch ring with make 8 Candy Corn Rice Krispy Treats!

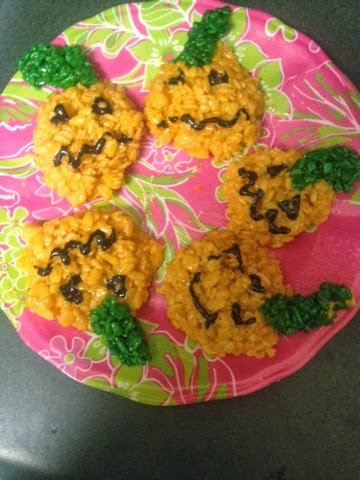
Pumpkin Rice Krispy Treats
Here is the recipe for these flat Pumpkin Rice Krispy Treats! I have also made round ball shaped Pumpkin Rice Krispy treats before, but I needed a lot, so I chose to make them this way this time so that I could have more!
In a microwave safe bowl combine:
5 table spoons of butter
1 and a half 10 oz. bags of mini marshmallows
Orange food coloring
Microwave for a minute at a time stirring in between each time you microwave. Once the mixture is liquified, you can stop microwaving and mix in the Rice Krispies!
8 cups of Rice Krispies mixed into the orange, butter, marshmallow mixture.
Once completely mixed, take two spoons and spoon out a clump onto parchment paper ( I didn't have any so I just used a pan and sprayed it with Pam).
I then put the Orange blobs in the fridge for 10 minutes so that they stiffen and I can shape them more like pumpkins.

Next, it is time to make the pumpkin stems! Occasionally I will use a tootsie roll, and use my fingers to twist it and form it into a stem, but this time I made green Rice Krispy stems.
1 cup of mini marshmallows
1 table spoon of butter
green food coloring
Put these ingredients in a microwave safe bowl, and microwave for 30 seconds and stir just like you did for the body of the pumpkin.
Once they are ready, combine 3/4th of a cup of rice krispies and mix it all together.
I then butter my finger tips and take a pinch of green rice kris pies and form a little stem.

The last step is decorating your pumpkins! I used black glitter gel icing this time around, but in the past I have melted chocolate and put it in a baggy, cut the corner (making a tip), and decorated them with chocolate!
Another fun decorating tip is using green icing to draw leaves around the stem!

Candy Corn and Pumpkins on Lilly plates! 
These adorable Halloween pot holders that I found at the Dollar Store for $1 helped me bake tonight!


These adorable Halloween pot holders that I found at the Dollar Store for $1 helped me bake tonight!
xoxo,
Southern Lilly Lady
P.S. This is my absolute favorite time of the year so I hope yall enjoy! If you make these, post a picture, i'd love to see how they turn out!


No comments:
Post a Comment